Last year I found a guide to making a Weeping Angel costume, and decided to use it (with some changes) as a basis for creating my Halloween costume this year.
These are my notes on the changes I made and what did and didn't work.
The mask was one of the easiest things. A basic store-bought plastic mask, with the details built up using PlasticWeld epoxy putty (plumber's putty, from Home Depot).

Because the angel's mouth is open, it actually extends down over the mask's chin and I had to add extra chin with the putty.

I cut the plastic out of the mouth area and added in the fangs.


A couple of layers of paint turned it to "stone" (matte for the top layer, angels aren't shiny).

For comfort, I lined and padded the mask with toweling material. I also enlarged the nostril holes (hidden by the mask's nose) and glued a strip of black stocking material behind the teeth to hide my chin from showing through the mouth.

The mask was reasonably comfortable but the epoxy putty made it heavy. I might try to recreate it with a lighter modelling clay like Crayola Model Magic.
Next, the wig. This was very last-minute as I was running out of time.

I agree with the author of the blog I was referencing: it might be
better to model out of clay instead; the yarn is difficult to work with.

Next, the wings. I wanted to do these differently from the blog I was referencing, because I wanted to be able to detach the wings for portability, and I wanted to try and design the wings and dress so I wouldn't need a second person to help me change into it.
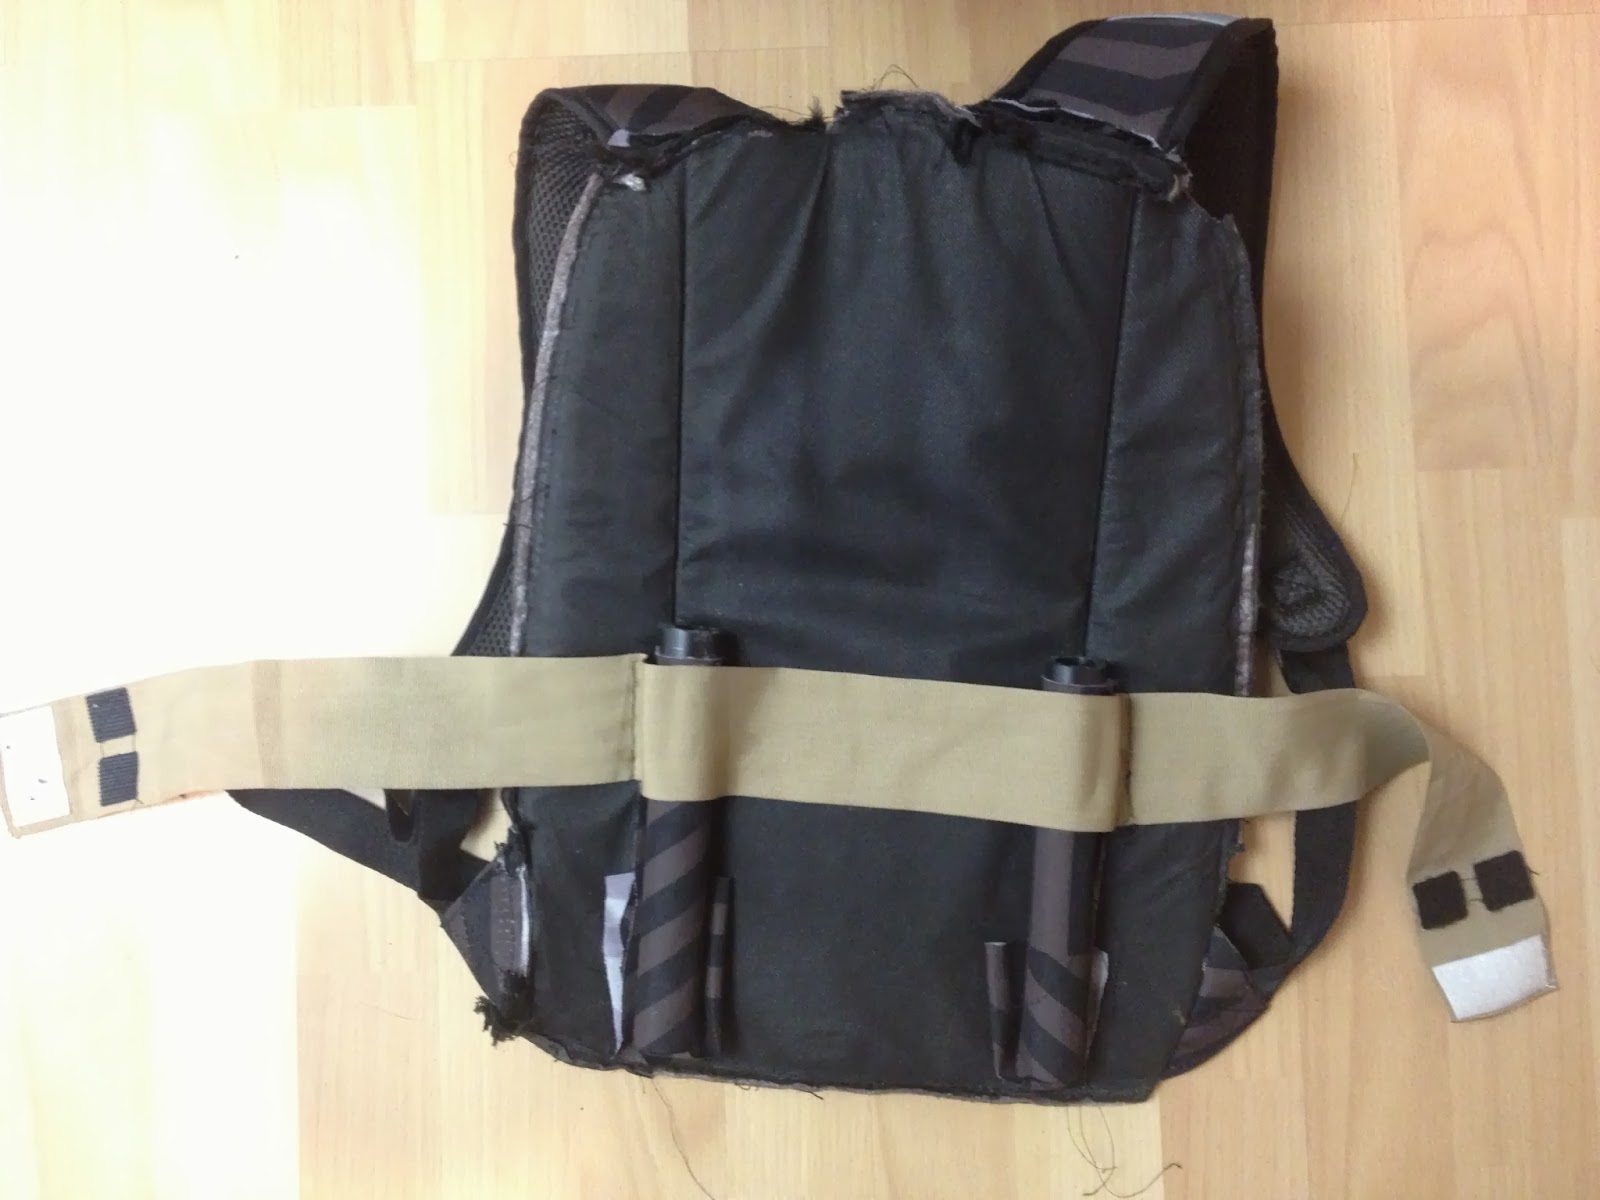
First step was to take apart a backpack with comfortable padded straps to make a harness. I found some PVC pipes at the hardware store that were a perfect fit to be a socket and support for the wings. I attached these to the backpack padding, and added an extra strap with velcro closing to ensure they were supported firmly upright.
The wings are made of hard foam sheets from the craft store, glued firmly together in layers. Initially I tried using duct tape to secure the foam to the PVC pipes, but duct tape doesn't stick well to styrofoam, so I ended up using glue.
Here are the wings, partially made, slotted into the harness:

Wing showing the pipe that slots into the harness:

Detail on a wing showing the layers, and the carving of the feathers. I was hoping the paint would cover up the joins between sections of foam better, but it's really only visible at this one place:

Next, the dress. I wanted a comfortable top, so I picked up a cheap sweatshirt at a second hand shop and chopped off all but the shoulders.

Apart from the shoulders, the dress was made from a dark grey cotton fabric, essentially a tube sewn so it hung in folds.

The front was sewn to the sweatshirt top, but I didn't sew the back so it could be closed with velcro. This is how the back looked after painting, when the velcro is closed up:

And with the velcro opened, two vertical slits (hidden in the folds) allow the wings to be slotted through to the harness underneath:

For the arms, I tried the instructions in the original blog. I used grey stockings, cut and sewed into gloves, and painted them.

Not only was sewing the gloves a lengthy pain, it was also uncomfortable and the arms were still more transparent than the rest of the costume. It didn't look awful, but it didn't look perfect either. I used a stocking hat as well to cover my ears and neck, however, I also had trouble with the neck creeping up and it had to be pinned to stay in place.
I've already bought a lycra bodysuit to paint and see if it makes a better substitute.
Here's how the costume (minus arms and wig) looked on a mannequin,, not yet fully painted:

After taking this photo, I went to work leaving it here just inside the front door, and forgot all about it when I came home in the evening. Almost gave myself a heart attack bumping into it in the dark!
Here's me at the SOE Halloween party. You can see the difference in the transparency of the arms:

The other problem was that I didn't realize how much the wings would swing around when I was moving. On a stationary dress mannequin it wasn't a problem, but when walking I had to constantly adjust them or hold them. I need to revise the wings to prevent them from swinging sideways.
Before wearing this again, I will try using a bodysuit instead of the stocking arms, and redesign the wings to stop the swinging. Possibly also redo the mask with a lighter clay.
Overall, it was fun and challenging to make, but not at all comfortable to wear. OK for a short costume contest, but I couldn't have worn it comfortably for any length of time. Still, it looked good enough that I tied for first prize and freaked out a few people by following them around!
Here are some of the final greenscreen photos from the SOE party.


No comments:
Post a Comment